GTR Forum banner

Small's R33 Le Mans Limited (sonic)

54K views 175 replies 73 participants last post by  Saifskyline  
#1 ·
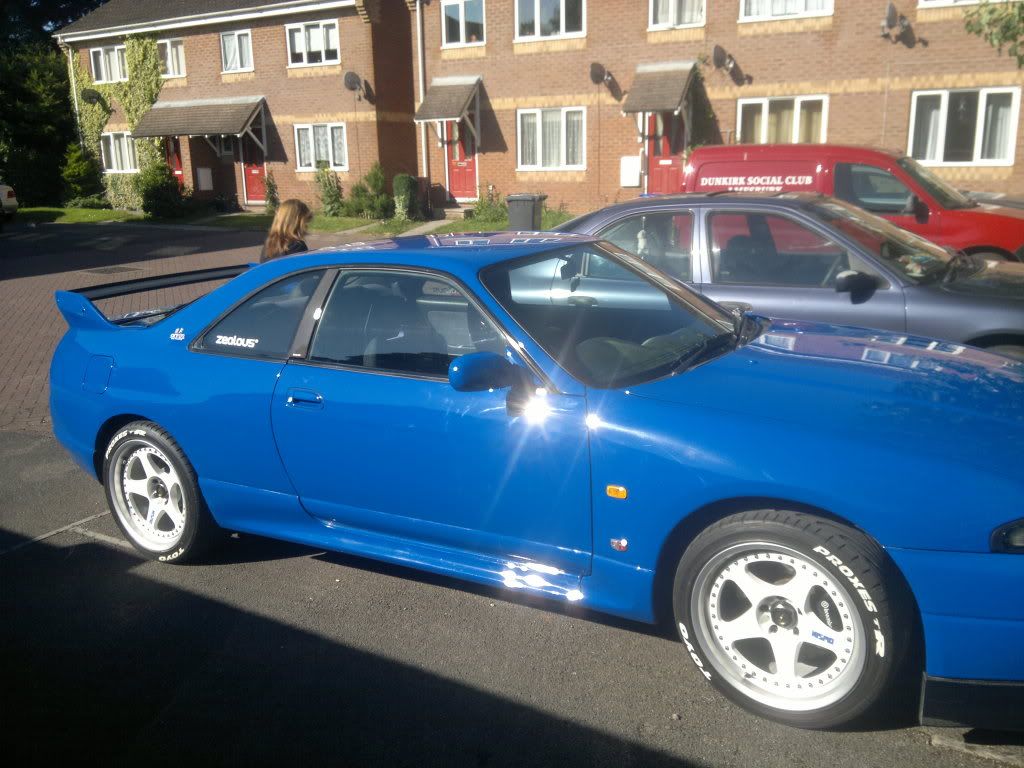
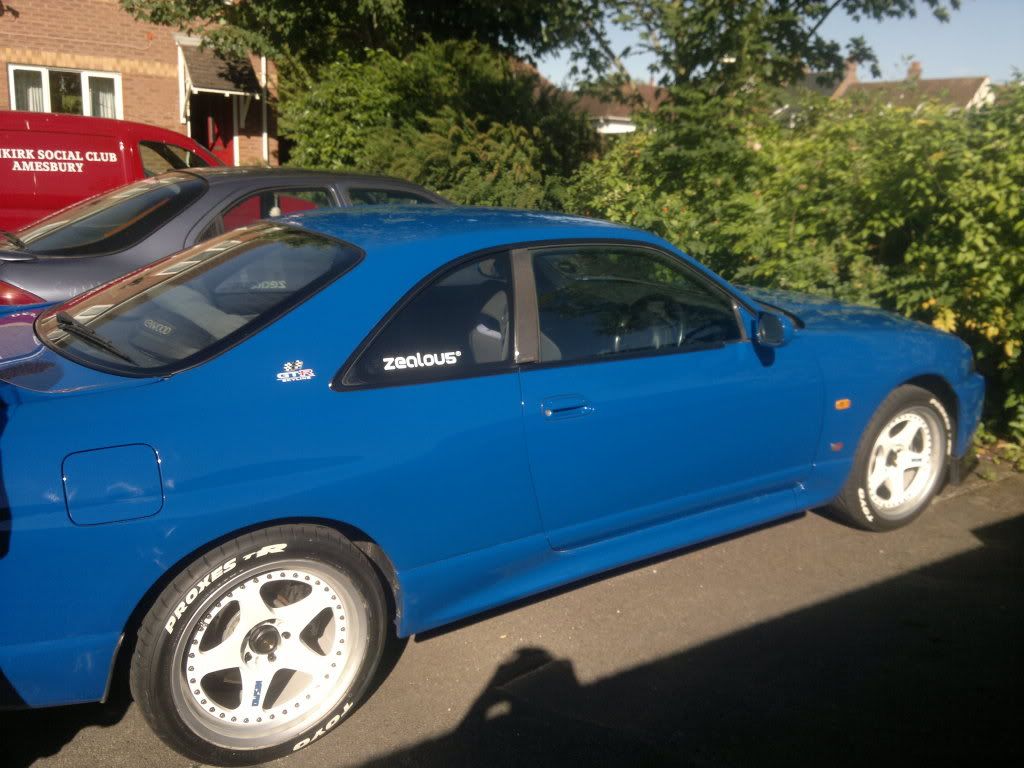
This is my first GTR, its a 1996 Le Mans Limited. I purchased the car 2 years ago and have enjoyed every minute of ownership. I have decided I should start a build thread as the engine unfortunately has to be replaced and I have taken this as an opportunity to give the car a small make over. :smokin:

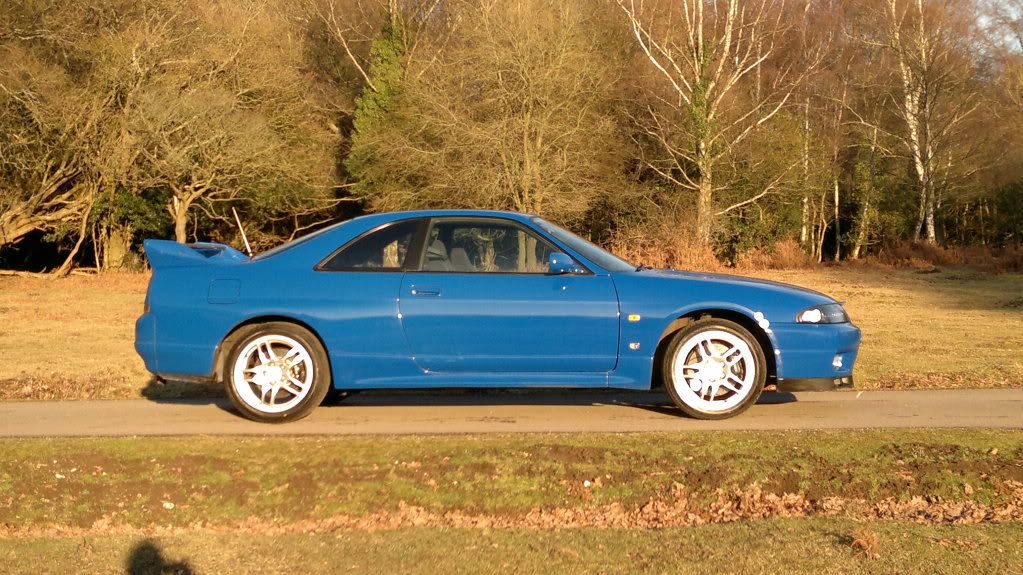
This is the car as I bought it


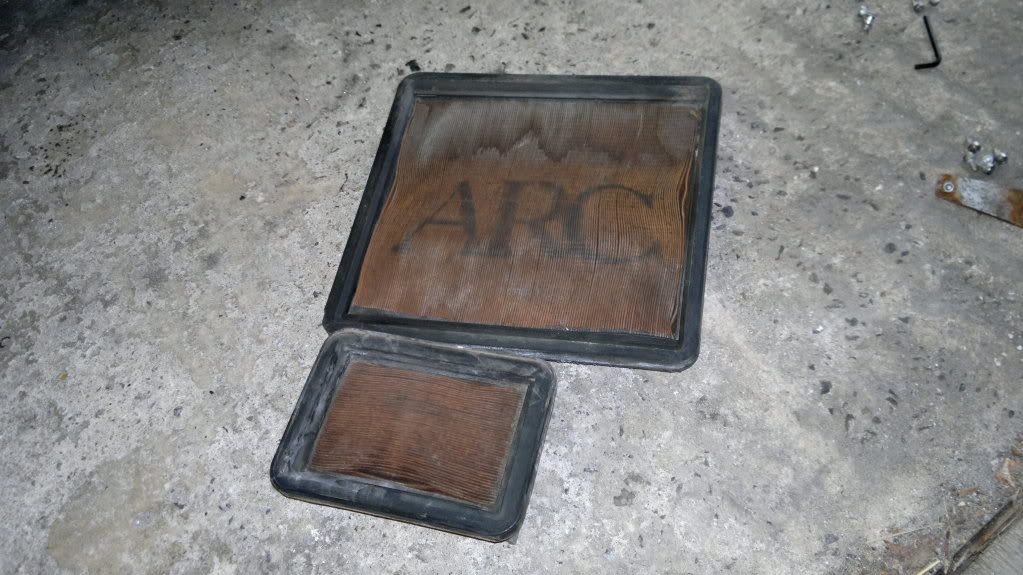
First job was replace the manky old air filters, they had definitely seen better days :chuckle:
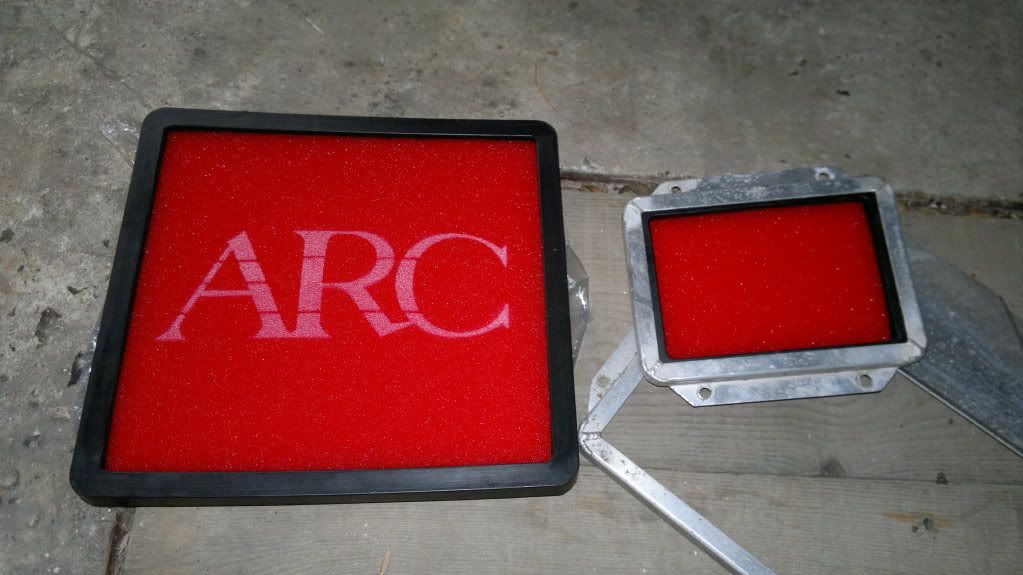
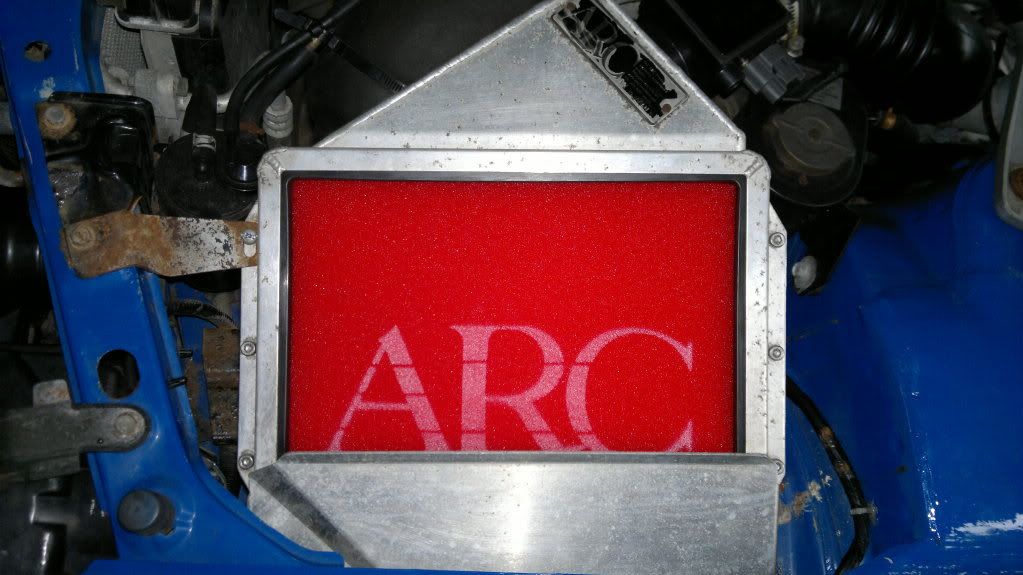


nice new filters


Next the ebay exhaust had to go, it was rather LOUD! :eek:


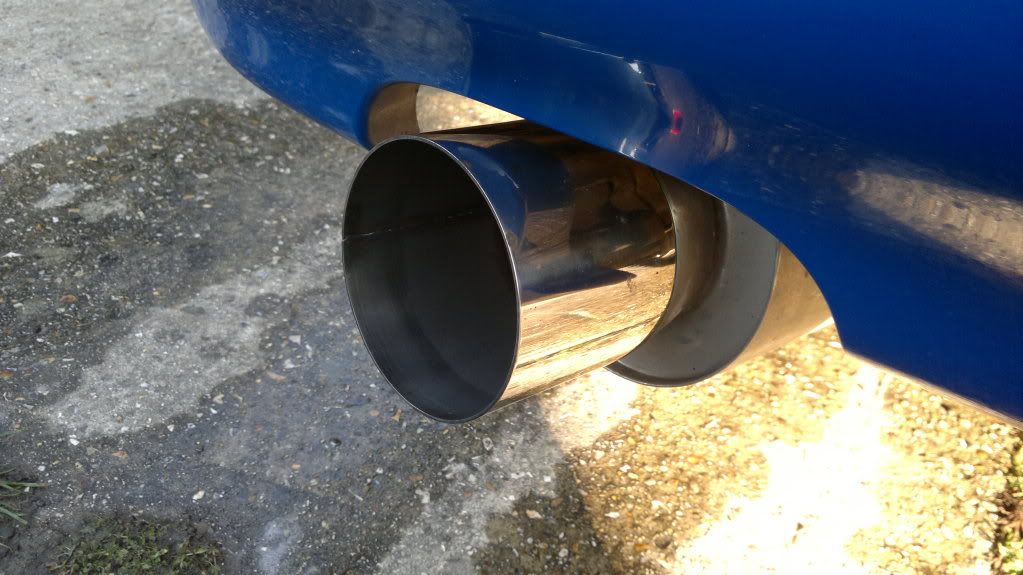
So I needed something quieter as although it was amusing setting off every car alarm within 15 feet of the car at first it soon got tiresome. Enter the Kakimoto regu 06&R


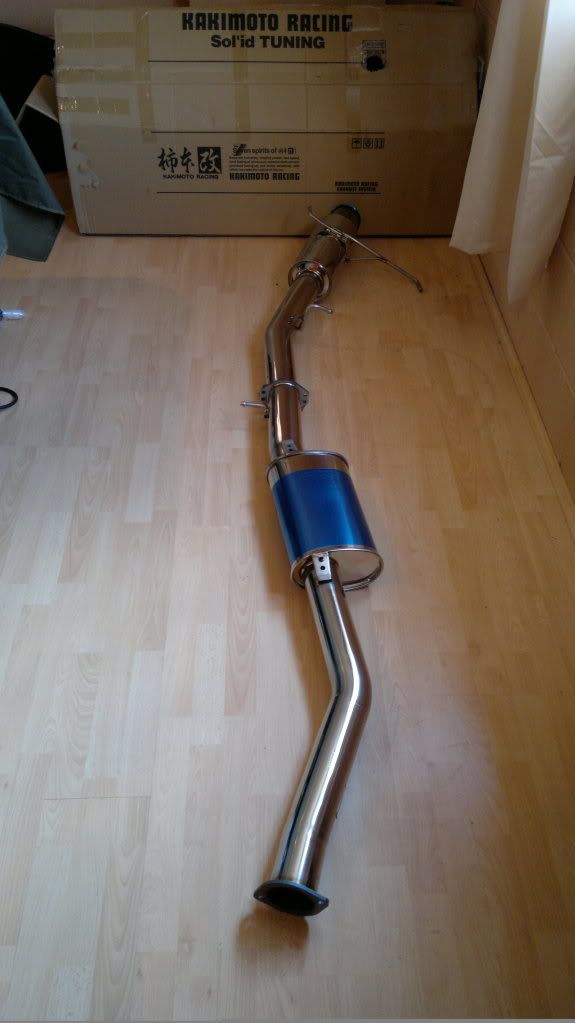
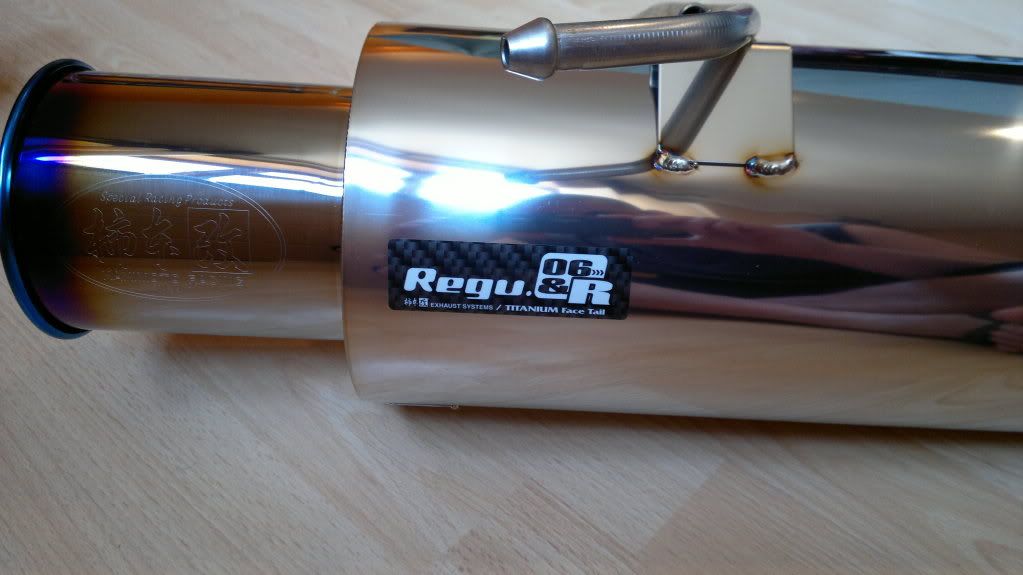
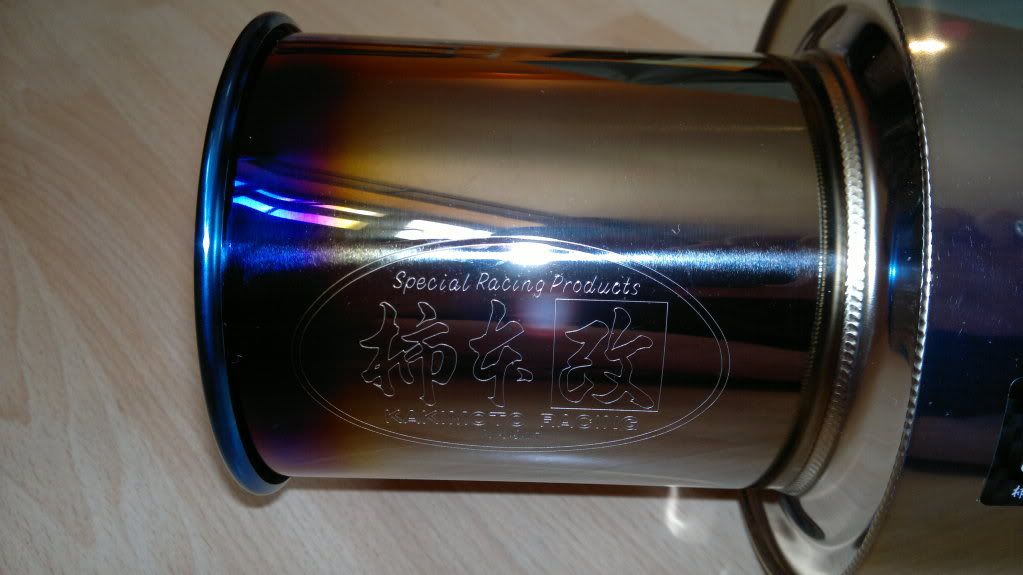
As you can see its a very good looking exhaust and easily meets trackday noise tests. It is a very quiet exhaust, this does however come at a price. The price being flow, I believed it to be 3.5'' all the way through however I found that the reason its so quiet is because it has a restrictor in the back box. No bother off it went to have a new backbox fabricated keeping the Kakimoto tailpipe but without any restriction. Obviously it has become louder but is still within trackday limits. In my opinion it sounds even better than before.

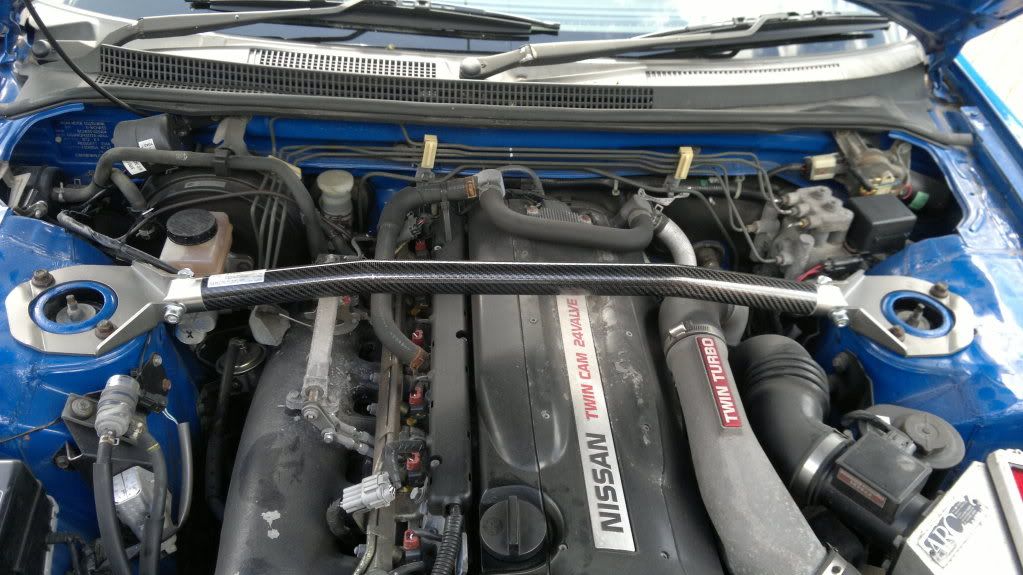
Next came a cusco carbon strut brace, now the embarrassing engine bay shot.


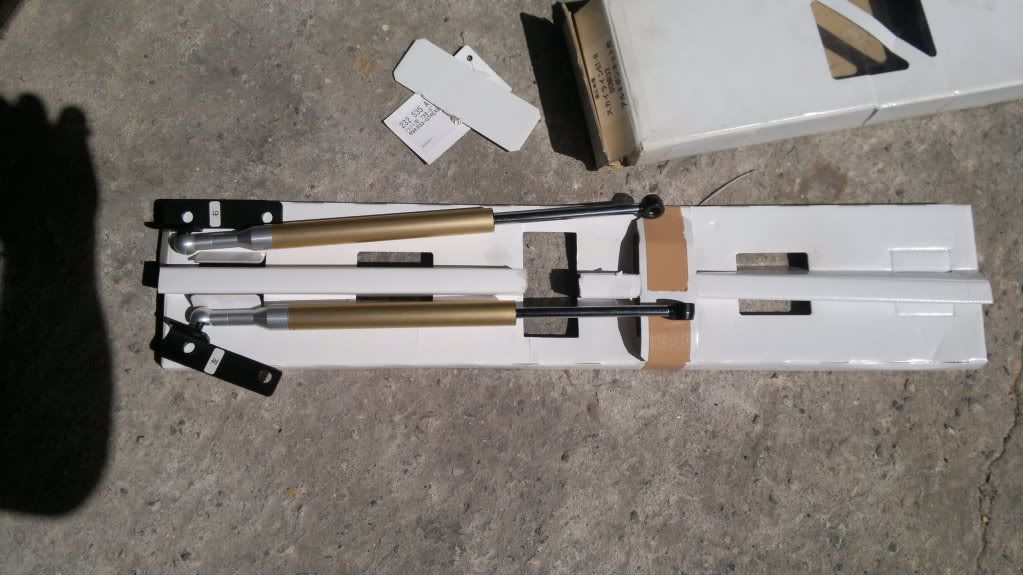
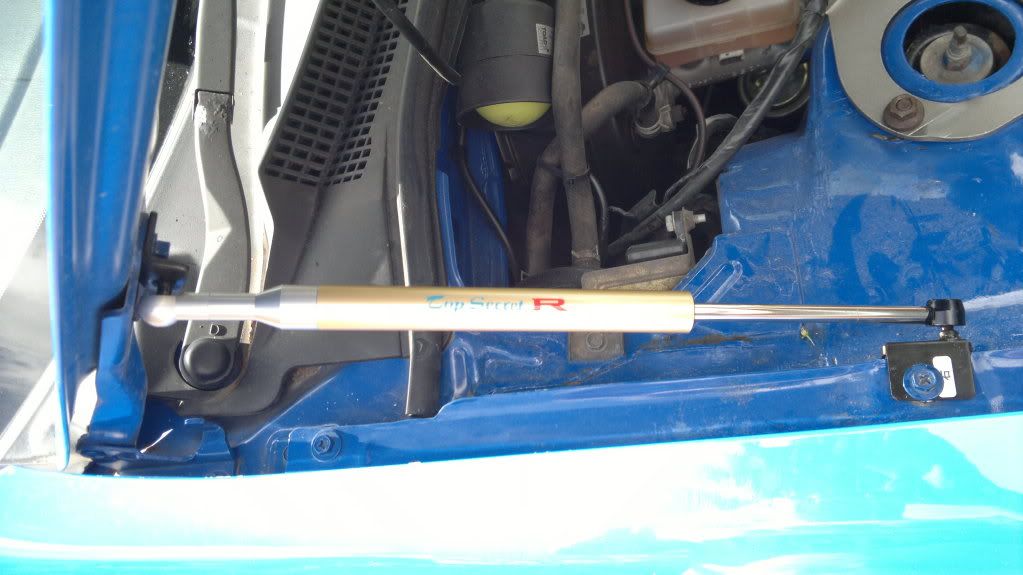
This was then followed by Top Secret bonnet dampers


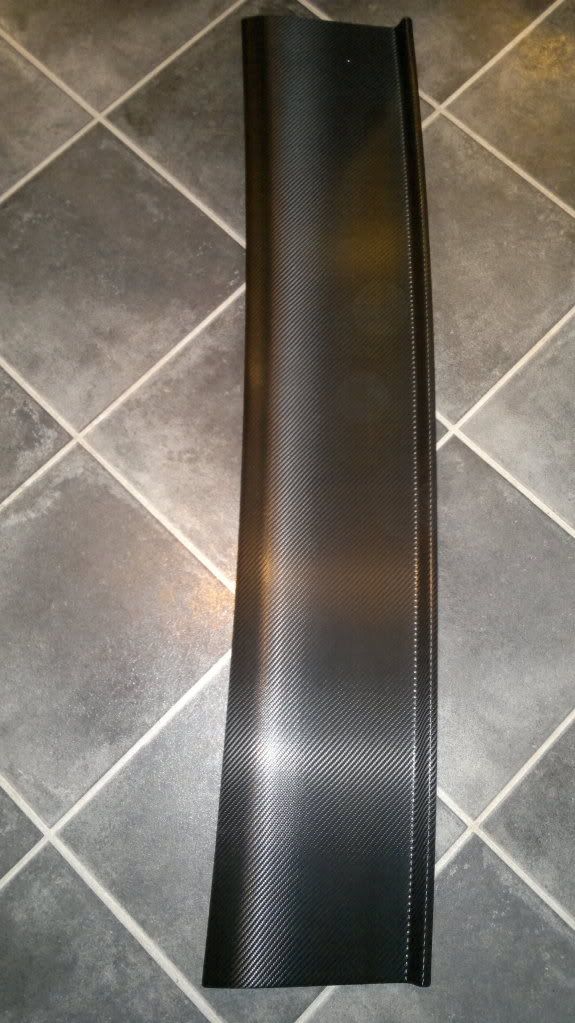
I had to get the nismo carbon spoiler blade carbon wrapped as the lacquer was peeling off and the carbon has become sun damaged beyond repair.


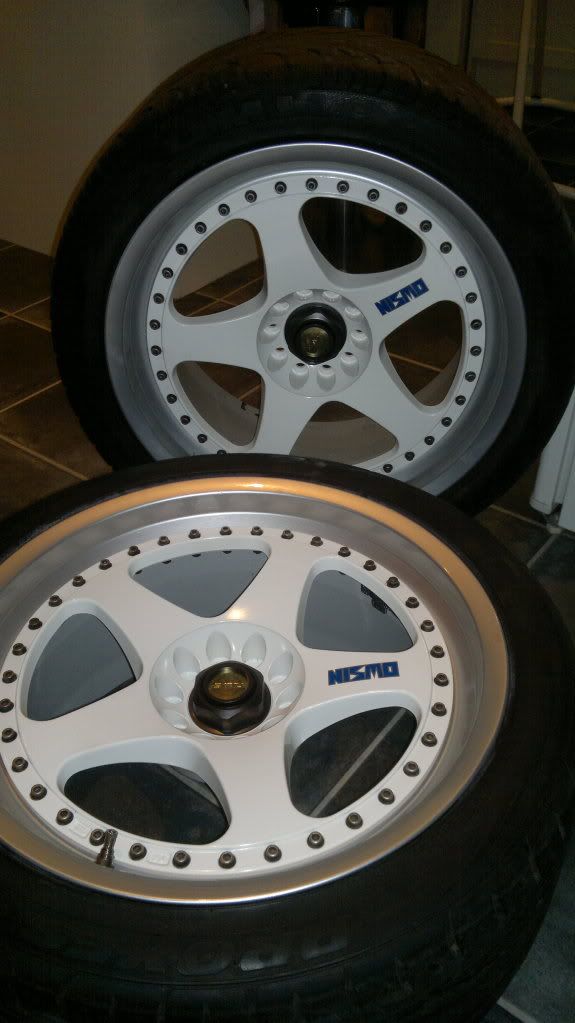
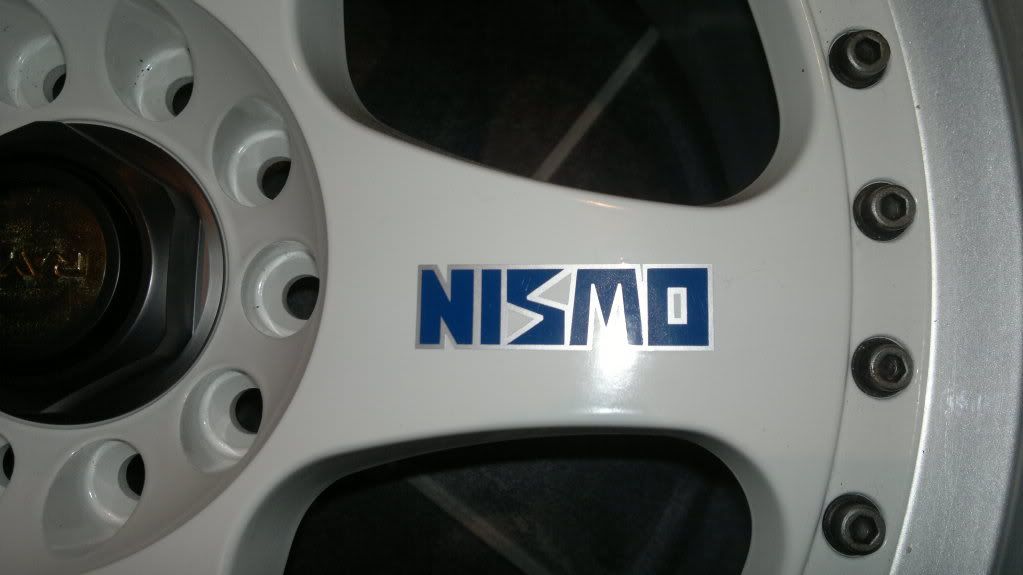
Around the same time I managed to find some LMGT1's in 18''x10'' I just had to get them refurbished in a colour more befitting of a Le Mans Limited


I have done a few other small mods to the car but as yet have no photos, I fitted a Nismo shortshift kit, Nismo clocks and gauges, Top secret oil cap, Nismo radiator, R35 GTR badge, Greddy radiator hose, carbon fibre radiator brackets and a carbon fibre front splitter. I'm sure that I have forgotten a couple of bits but I will no doubt cover anything I missed as the build continues and goes back together when the new engine goes in.

Thanks for reading thus far :wavey:

Will Small
 
#5 ·
Cheers wills, I certainly hope so mate. I can't wait to see it on the road either.
I saw the picture of your 260 at Wilton, I wish I could have made it over but was
Unable to make it, agree with will d you should get it printed and up on the wall
It is a stunning picture. Hope to catch up soon, probably japfest.

Will
 
#6 ·
Too many Wills!

Will,

Great to read a bit of history behind the car and how you got there. I love reading about the backgrounds to the cars and the little niggles and problems that people overcome on the way. Subscribed buddy and keep it going, can't wait to see the rest of the bits and photos etc.

Will.
 
#10 ·
Cheers mate, as soon as I saw them I knew they were the only wheels I wanted.

No surprises really as for the engine, just slightly stronger than before in the
Guise of forged pistons, rod bolts, tomei sump baffle, acl bearings and ported head.

Thanks for reading dude.

Will
 
#12 · (Edited)
Seeing as Will's car has been staying at our place for a while now Will asked me to update his project thread
to keep everyone up to date with the resto work we're doing on his LM.

Ready on the lift for the strip down to begin.


Love the LM blue really compliments the curves of the R33.


:clap:

First step was to remove the engine and gearbox, the engine was suspected to have bottom end damage so
Will had a fresh build underway, should be good for 5-600 bhp :D


As many of these engines/gearboxes as Ive seen now out of the car I'm always blown away by the shear size of the GTR power train.


Rear subframe/diff/Hicas assembly removed ready for a full strip down and resto.


Stripping the suspension components down ready for balsting and fresh powder coating.


A few weeks of hard work and elbow grease and the rear subframe comes up a treat! Better than Nissan ever made them!
Fully equipt with SuperPro and Whiteline bushes throughout.:thumbsup:


Front subframe had the same full restoration treatment, Will is a very particular chap, which is great!:clap:


New SuperPro steering rack bushes, brand new OEM inner and outer ball joints and track rod ends were fitted.


:thumbsup:
bob
 
#14 ·
Will's strut tops had been repaired, (By a very, very bad person):mad: Some time in the past. They needed doing again needless to say! :wavey:
You could see the rust bubbling and growing below the paint.


There was nothing for it but to cut out all of the layers of rusty metal and replace with new metal, patch ups just don't last and just wont do!


Even we were shocked at the extent of the rust hiding below the botched patching of the strut tops.


Shocking stuff!


So we cut out all of the rusty metal until we just had bright clean metal, this was then treated and the donor rust free strut top was fitted.


You can see from below how well the new panel fits!:thumbsup:


You can see the brace we made to keep things from distorting while we cut out the passengers side strut top. One down one to go!


:)
bob
 
#16 · (Edited)
Continued.......
Next on the to do list was tackle the underside of Will's car.
After spending so much love on the subframes/suspension we couldn't possibly bolt them onto the tired looking underside.

The car had at some time in it's life been undersealed, Im really not a fan of the stuff, it generally can hide a multitude of sins,
once applied the good/bad quality of rust removal underneath can be hidden easily. If there is any rust and it's not treated it can continue to spread from the inside out.
It's generally not til it's removed that the full horror story can be revealed, which in Will's LM case was pretty terrible. :rolleyes:
(much prefer total rust eradication to bare metal and then something like Rustbuster Epoxy resin 121 or POR 15 be applied).
We found sections that had literally had bathroom silicone sealant squeezed in to fill up rusty holes, smoothed over and then coverered over with a thick layer of underseal. :puke:

The rear of the front wheel arches had holes in them that once you cleared the rust and underseal you could actually see the interior carpet through.


So we drilled out the spot welds and carefully removed the front panel to access the section behind it and to allow us to cut out the rust.
We would then repair the front panel and reinstate it.


This is how it looked before the clean up of the underseal. (drivers side).


The panel we removed from the front wheel arch.
It was cleaned up and all rust removed, then new sections were made and welded into the cleaned up panel.


Once this was done and we had hand made the new repair sections we put it all back the way we found it but this time with zero rust!:clap:


All protected and solid.


:)
bob
 
#19 ·
Both Sills needed replacing, the previous welding/repairs were awful, beyond repair and full of rust. The only way to make good was to cut them out and replace with new panels.

So glad we did as the inside of the sills were full of rust.


Both sides had suffered badly from rust eating its was through the sills.
(drivers side rear inside the sill).


All this was to be cut out back to good clean metal, no amount of rust treatment alone would stop this stuff!


Nasty evil brown stuff!!!!:rolleyes:A time bomb waiting to destroy a beautiful car!


Crushed sills/jacking points had let even more of what the road had chucked up in over the years.
Once the layers have been separated its much easier to get the sill and jacking point straight and perfect again.


Bad...


Bad....


Both sills had all of the rust cut out and all surface rust removed back to bare metal.


New strengthening was added to replace the material that had rotted out. Once primed and protected we could fit the new sills.


Making sure the fit of the new panel is 100%.:thumbsup:


We then Plug welded where the old spot welds were drilled out for a spot on fit.


good as new!!!:clap:


The fit and quality of new Nissan panel was perfect!


One down one to go....


Drivers side sill goes on lovely too!:)


Inside the sills, all good clean and rust free!
These will be treated to a very liberal covering of Dynax S50.


With the new sills we even fitted 4mm 90 degree angled steel strengthening to the jacking points, the whole lower sill is brand new too as the original was terrible.


This is what was lying beneath the underseal, completely rotten rear arch section, the previous garage had just welded plated on top of the rust.


You can see here how bad the previous repairs were!
All this got cut out and replaced as a matter of course!:thumbsup:


Here's the new panels we hand made to replace the terrible rusty work that had been done previously!


All good and solid and protected throughout!


Hand made panels fit perfectly.;)


The other side was the same bad work, unbelievable that anyone could be happy to do such and botch job! You can see how they have welded untreated metal straight on top of the old rust.


Not cool! :(


All of the above was of course cut out, this pic below shows the layers that had to be fabricated to make the sills perfect again.
The ends are still to be made and reinstated.


More to come.......
:thumbsup:
bob
 
#21 ·
No worries Will bud, what I forgot to mention is Will has been there too every step of the way! Dismantling the whole car, nut and bolt, making metal replacement panels, welding, you name it he's done it!
It's been one hell of a journey! Couldn't ask for a nicer or keener guy to be on that journey with!:clap:
See you tomorrow Will mate!
:thumbsup:
Bob
 
#29 ·
That is an unbelievably extensive amount of work, cheers to both of you! I would have been gutted soon into this project, afraid of looking anywhere else not wanting to find more of the same.

Very happy for you to take it on and can't wait to see more progress pics!